Tuesday, 17 November 2015

Team hover


Team hover
Daisy and I started to make the former template for the thrust duct this weekend.
We are using half inch sterling board; three sheets of sterling board are required to make the former. 
First you are best to build a decent bench or table to work from, it makes life so much easier when you work in a comfortable and safe working environment.
The boards were cut to size and joined together using 4x2 timber and wood screws. I made mine to a 65" square in order to cut out the circle that forms the inside diameter of the duct which is 60 1/4 inches.
It is essential that you have a good all round skills base for building a hoverwing.
To cut out the 60 1/4 inch circle I made a jig for the router. I made it adjustable so that I could start off big then work my way down to the 60 1/4 inches required. This is a good way to tackle this job as it is easy to make a mistake, and if you do, you could end up cutting the circles too small - and that's expensive and time consuming. Always a good idea to think it through and get it right the first time.

We are starting the build by building all the component parts first, such as thrust duct, lift duct,rudders, tails, fins, engine frame etc.
The reason for this is that our workshop is too small. If we build the hull first there would be no room left to build the other components.

Our spare room at home will become a temporary storage  space for hoverwing parts. Luckily Daisy is very understanding!


Marking out the circle
Daisy using router


Cutting a circle
Duct former template


Thinking time


Thinking time

A lot of time has been spent looking at drawings and reading build instructions.

We have found this process challenging because the UH drawings are not great, and the measurements are imperial and not metric, so we have to try to remember how to use the imperial system or convert to metric.


We have found that all this thinking time and planning has thrown up the chance to make new tools and gadgets, all of which make this process better and, hopefully, we will produce a quality craft at the end of it all.


Adjustable router jig


Monday, 27 April 2015

Engine first start

Today we started the engine for the first time since i rebuilt it, everything went according to plan with no issues. Next I need to fit 2 silencers and a radiator then set the timing properly.


Team Hover


Sunday, 29 December 2013

Still working on the engine

For years this engine has been lying upside down, without it's sump, in a shed.
The engine is now completely striped down and, as I thought, it is full of grime and grit!
Crankshaft out and inspected, all looks good; bearings and journals are in remarkably good condition, as is the camshaft.

The Subaru engine is a cast alloy unit. I have tried several methods of degreasing and cleaning. One method of cleaning I tried was a DIY home made ultrasonic cleaner! OK - it's not actually ultrasonic, it's a plastic box with an orbital sander strapped to the side, as seen on youtube.com !

Step 1: fill the box with water and add ultrasonic engine cleaner - that didn't work so then I added karcher pressure washer fluid - and that didn't work! So I have resorted to using a container full of Gunk engine degreaser, and brushes -  hard work and time consuming - followed with a visit back to the ultrasonic box to be rinsed - well, it seemed a shame to waste it! - then pressure washed to finish, that worked well, then dried off with the compressed air.

I forgot to mention the inside of the rocker covers were filthy, solid with years of oil, carbon, and grime - they took a couple of days to steep in the degreasing bath before cleaning.

As for cleaning up the outer casings of the engine, after degreasing and pressure washing I am going to try giving them a blast over with the soda blaster. I've never used baking soda, yes, I did say baking soda! to blast before so this should be interesting to see how it works out.
I am lucky enough to have my own blast equipment: a blast pot and cabinet.

I found soda blasting on good old youtube.com, a great source of information and 'how to's.

Soda blasting appears to be non abrasive and is kind to glass, rubber, and chrome but is great for removing paint. I can also recommend electrolysis as a method of removing rust - again, you will find it on youtube.com

I would say that this engine is worth fixing (the engine didn't cost me much) the only thing is that parts are not easy to come by for the EA81, and although you can find parts on ebay.co.uk, they mostly come from America so p&p is expensive - and watch out for import tax!

So far all I need is a full set of standard piston rings, which I can get in the UK. A full gasket set however is more difficult to get here, although I can get it as an import from the USA.

Sunday, 1 December 2013

Subaru EA81 flat four 1800cc

Subaru ea 81


Sat 30 nov 2013
Subaru EA81 flat four 1800cc

The engine is an unknown quantity. I have no history of this engine or the year, I think it came from a brat pickup.

The engine is currently mounted on my engine stand for work purposes - a great pice of kit - it allows me complete access as I can turn the engine round to any angle to work on it. 
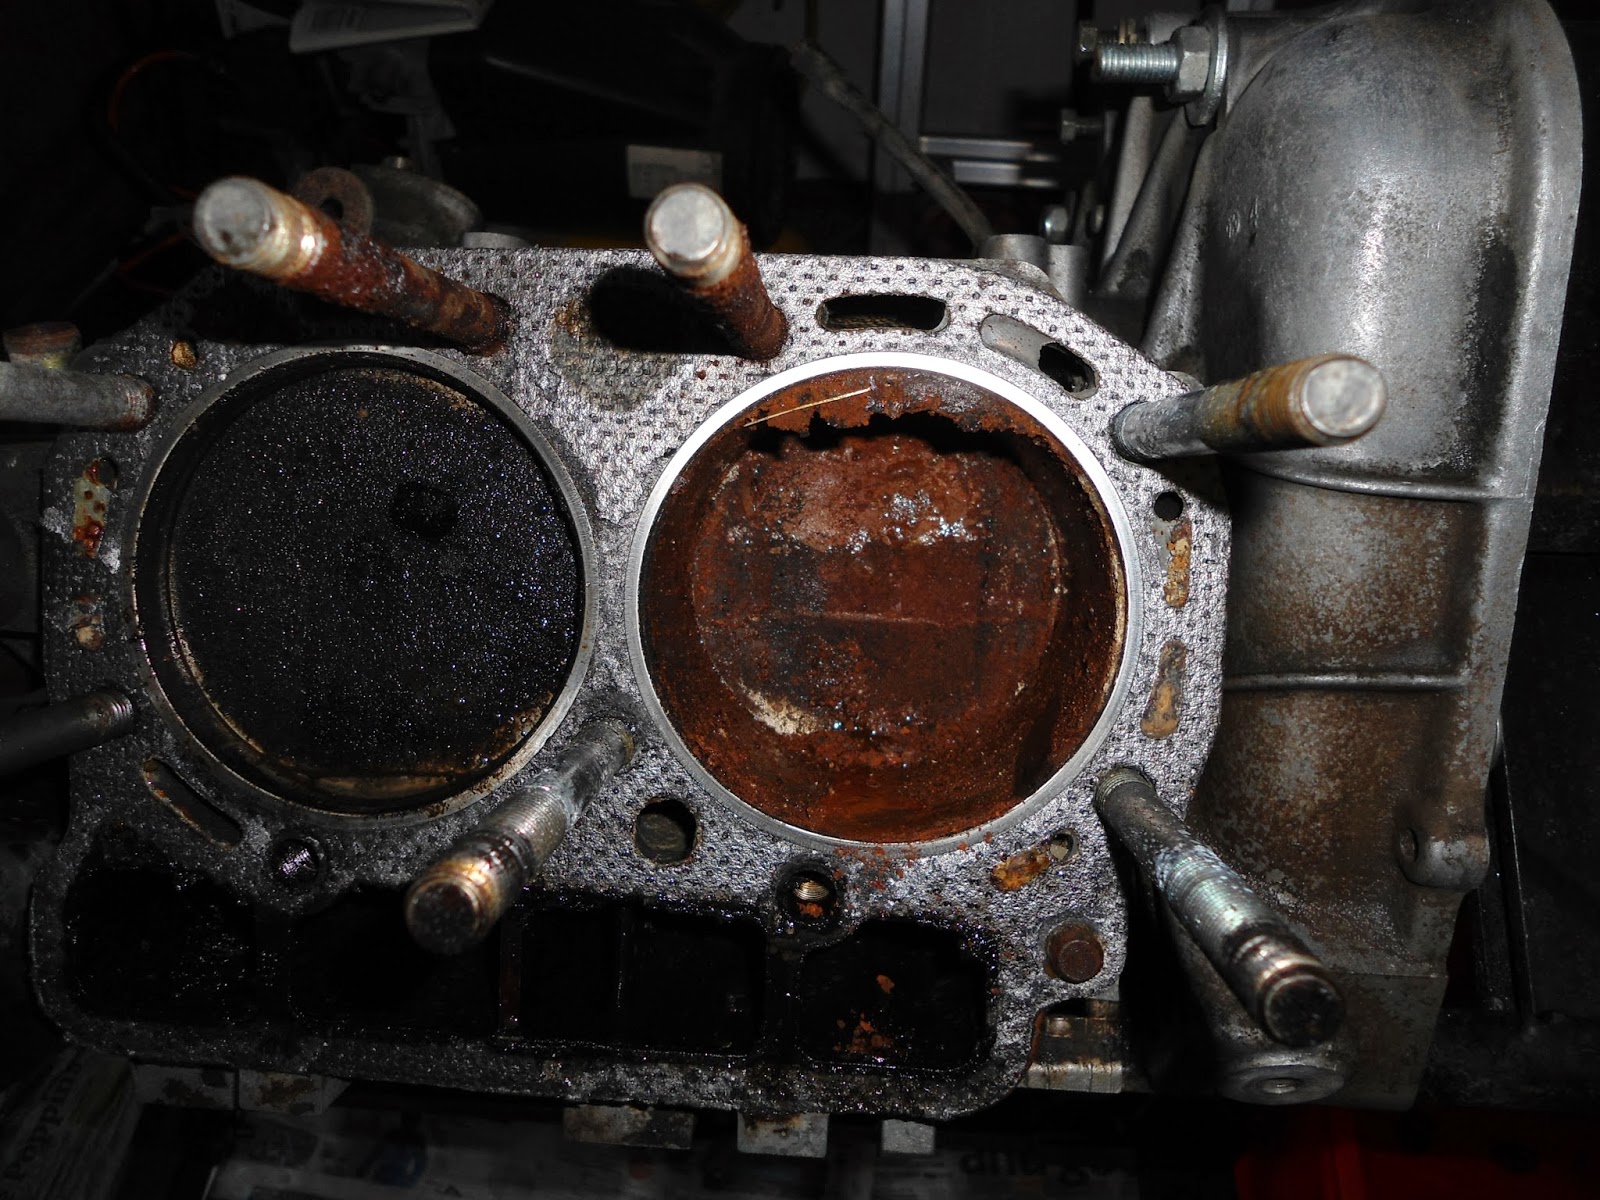
The engine is not looking good. I put a spanner on the crank to see how it would turn and oops! It didn't MMMM! Only one thing for it, get the plugs out and have a look, YUCK! I've never seen anything so bad! - one of the plugs was completely rusted up, so I had to take the cylinder heads off - this is a straightforward job, and everything went well. The two rear cylinders were sitting with water in, and obviously had been for some time, this has resulted in a buildup of rust in the barrels. I have soaked them with engine degreaser, then cleaned them out. I gave them a bit of a rub with some polish, which has helped, so I'm thinking I might get away with some light honing?  Still got the jury out on that one!

The heads
I don't think they're as bad as the look; I might get away with cleaning and re-seating the valves.


very rusty spark plug
cylinder head / right


cylinder bore / right
cylinder bore / left

Sunday, 10 November 2013

Almost ready


Engine frame almost complete, just the feet to go on now and then powder coating. It's all a bit tricky, even the variator leg is at a slight angle. The holes all line up with each other and everything seems to be straight. If I haven't mentioned it before I'll say it now, it's best to make everything up in component parts then make yourself a jig, it's simple a sheet of ply and some 2 x inch and screws then lots more measuring. Once that lot's done, I found it relatively easy to assemble it freehand with a little bit of care. Remember when lunchtime hunger kicks in, it's time to stop or things start to go wrong - I learned this many years ago at great cost! I can recommend a wire rope/brush attachment for the angle grinder for polishing up the welds afterwards - a good weld is a thing of beauty, and this will finish it off beautifully!

Many thanks to Scotty from     www.hoverclub.org.uk
for recommending

www.hovercrafter.com

this is a great site for hovercraft especially the UH hovering

 www.hovercraft.com


engine frame
engine frame


wire rope/brush